Demonstrations
Busbar
“Electrical Heating in a Busbar” is an example model featured in the tutorial of “Introduction to Comsol Multiphysics” and explained there in great detail. The section “Getting the Maximum and Minimum Temperature” demonstrates how to obtain the two temperature extremes within the Comsol GUI.
The following Python code does the same thing programmatically:
import mph

client = mph.start()
model = client.load('busbar.mph')
model.solve()

(x, y, z, T) = model.evaluate(['x', 'y', 'z', 'T'])
(Tmax, Tmin) = (T.max(), T.min())
(imax, imin) = (T.argmax(), T.argmin())
print(f'Tmax = {T.max():.2f} K at ({x[imax]:5f}, {y[imax]:5f}, {z[imax]:5f})')
print(f'Tmin = {T.min():.2f} K at ({x[imin]:5f}, {y[imin]:5f}, {z[imin]:5f})')
This outputs the exact same numbers that appear in the table of the GUI:
Tmax = 330.42 K at (0.105000, -0.024899, 0.053425)
Tmin = 322.41 K at (0.063272, 0.000000, 0.000000)
You could now sweep the model’s parameters, for example the length L
or width wbb of the busbar.
Compacting models
We usually save models to disk after we have solved them, which includes the solution and mesh data in the file. This is convenient so that we can come back to the model later, but don’t have to run the simulation again, which may take a long time. However, the files then require a lot of disk space. After a while, we may want to archive the models, but trim the fat before we do that.
To compact all model files in the current working directory, we can do this:
import mph
from pathlib import Path

client = mph.start()
for file in Path.cwd().glob('*.mph'):
    print(f'{file}:')
    model = client.load(file)
    model.clear()
    model.save()
The script compact_models.py in the demos folder
of the source-code repository is a refined version of the above
code. It displays more status information and also resets the modeling
history.
Note that we could easily go through all sub-directories recursively
by replacing glob with rglob. However, this should
be used with caution so as to not accidentally modify models in folders
that were not meant to be included.
Multiple processes
As explained in Limitations, we cannot run more than
one Comsol session inside the same Python process. But we can start
multiple Python processes in parallel if we leverage the
multiprocessing module from the standard library.
import mph
import multiprocessing
import queue
Additionally, we have imported the queue module, also from
the standard library, though only for the queue.Empty exception
type that it provides.
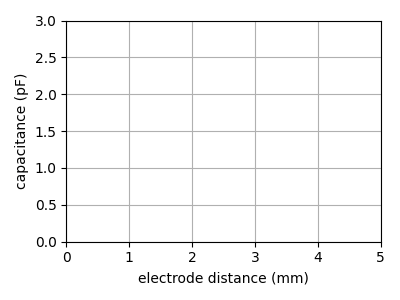
In this demonstration, we will solve the model capacitor.mph
from the Tutorial. We want to sweep the electrode distance
d and calculate the capacitance C for each value of the distance,
ranging from 0.5 to 5 mm.
values = [0.5, 1.0, 1.5, 2.0, 2.5, 3.0, 3.5, 4.0, 4.5, 5.0]
Next, we define the function that we intend to run in every process,
i.e. the “worker”. The function sets up the Comsol session when the
process starts, then keeps solving the model for every distance value
that it receives via a jobs queue. Each time, it evaluates the
solution and returns the capacitance via a results queue. It does
so until the jobs queue is exhausted, upon which the function
terminates, and with it Comsol session and Python process.
def worker(jobs, results):
    client = mph.start(cores=1)
    model = client.load('capacitor.mph')
    while True:
        try:
            d = jobs.get(block=False)
        except queue.Empty:
            break
        model.parameter('d', f'{d} [mm]')
        model.solve('static')
        C = model.evaluate('2*es.intWe/U^2', 'pF')
        results.put((d, C))
Each worker will only use one of the processor cores available on the machine, as that’s the whole point: We want to achieve maximum speed-up of, say, a parameter sweep, by having each core work on a job corresponding to one of the many parameter values, which it can do independently of work being done for any other value.
We could also solve this sequentially, one parameter value at a time. Comsol’s solver could then make use of all cores and would also employ some parallelization strategy in its internal computation. But the speed-up would not scale linearly with the number of cores, especially for large numbers of them.
We might use a “parametric sweep”, a feature that Comsol does offer. But by doing this in Python we retain full programmatic control of which parameter is solved for and when. The parameter values don’t have to be hard-coded, they could come from user input or be generated depending on the outcome of previous simulations. For example, this approach lends itself to iterative optimization schemes such as the “genetic algorithm”, where a batch of simulations would be run for each new “generation”.
Note how the returned results also contain the input parameter. As the worker processes will run asynchronously in parallel, we cannot take for granted that output is returned in input order.
Before we start the computation, we add all parameter values to the
jobs queue:
jobs = multiprocessing.Queue()
for d in values:
    jobs.put(d)
We also have to provide the results queue, which is of course empty
at first.
results = multiprocessing.Queue()
Then we can start a number of workers, say four:
for _ in range(4):
    process = multiprocessing.Process(target=worker, args=(jobs, results))
    process.start()
It may be a good idea to hold on to the process objects and add them
to a list processes, just so that Python’s garbage collection won’t
accidentally delete them while the external processes are running.
Finally, still in the main process that starts all the workers, we can
collect the results. We use a for loop and exploit the fact that
there will be as many results as there were jobs to begin with.
for _ in values:
    (d, C) = results.get()
We would then display them, plot them, save them to a file, or whatever it is we do with simulation results.
The complete script worker_pool.py, which implements all of
the above and also irons out some wrinkles not covered here for the
sake of brevity, can be found in the demos folder of the
source-code repository. As it runs, it displays a live plot
such as the one that follows. It is reproduced here preserving the real
time from a run with two workers. Observe how the first two data points
do in fact come in out of order.
A more advanced implementation may use a class derived from
multiprocessing.Process instead of a mere function, just to
be able to save state. For long-running simulations it would make sense
to store jobs and results on disk, rather than in memory, so that the
execution of the queue may be resumed after a possible interruption.
In that case one may, or may not, find the subprocess
module from the standard library more convenient for starting the
external processes. The worker implementation would then be in a
separate module that is run as a script.
Creating models: Java style
The primary focus of MPh is to automate the simulation workflow, like running parameter sweeps or optimization routines with customized, Python-powered post-processing. Creating and altering models is possible, see next section, but has some limitations.
However, any and all functionality offered by the Comsol Java API
is accessible via the “pythonized” Java layer provided by JPype,
which is exposed as the .java attribute of Client
instances, mapping to Comsol’s ModelUtil, as well as of
Model instances, mapping to Comsol’s model.
Let’s take this Comsol blog post as an example: “Automate your modeling tasks with the Comsol API for use with Java”. It starts with the following Java code:
import com.comsol.model.*;
import com.comsol.model.util.*;

public class HelloWorld {

   public static void main(String[] args) {
      run();
   }

   public static Model run() {
      Model model = ModelUtil.create("Model");
      model.modelNode().create("comp1");
      model.geom().create("geom1", 3);
      model.geom("geom1").feature().create("blk1", "Block");
      model.geom("geom1").feature("blk1").set("size", new String[]{"0.1", "0.2", "0.5"});
      model.geom("geom1").run("fin");
      return model;
   }
}
What it does is, it creates a model, which contains a 3d geometry component that is just a block 0.1 by 0.2 by 0.5 meters in size.
In Python, we would achieve the same like so:
import mph

client = mph.start()
pymodel = client.create('Model')
model = pymodel.java

model.modelNode().create("comp1");
model.geom().create("geom1", 3);
model.geom("geom1").feature().create("blk1", "Block");
model.geom("geom1").feature("blk1").set("size", ["0.1", "0.2", "0.5"]);
model.geom("geom1").run("fin");
Note how the functional Java code (excluding Java-specific syntax
elements) was essentially copied and pasted, even the semicolons,
which Python simply ignores. We named the Python wrapper pymodel
and assigned model to the underlying Java object just so we could
do this. We had to replace new String[]{"0.1", "0.2", "0.5"} because
Python does not know what new means. There, Java expects a
list of three strings. So we replaced the expression with
["0.1", "0.2", "0.5"], the Python equivalent of just that: a list
of these three strings.
Occasionally when translating Java (or Matlab) code you find in the documentation, or a blog post as the case was here, or which Comsol generated from your model when you saved it as a Java/Matlab file, you will have to amend code lines such as the one above. But they are few and far between. The error messages you might receive should point you in the right direction and the JPype documentation would offer help on issues with type conversion.
The advantage of using Python over Java is:
You don’t really need to know Java. Just a little, to understand that occasionally we have to take care of type conversions that JPype cannot handle all by itself. Which is rare.
You don’t need to install Java. It just ships with Comsol. You also don’t need to bother with compiling Java source code to Java classes via
comsolcompile.You can use Python introspection to understand how Comsol models are “created in code”. The Comsol documentation explains a lot of things, but not every little detail. Either use Python’s built-in
dir()or callmph.inspect()to see a pretty-fied representation of a Java object in the model tree.
To save the model created in the above example, we do:
pymodel.save('model')
This stores a file named model.mph in the working directory, which
may then be opened in the Comsol GUI or be used in any other Python,
Java, or Matlab project.
Creating models: Python style
The example from the previous section can be expressed in much more
idiomatic Python syntax if we ignore the Java layer and only use
methods from the Model class.
import mph
client = mph.start()
model = client.create()
model.create('geometries', 3)
model.create('geometries/Geometry 1', 'Block')
model.property('geometries/Geometry 1/Block 1', 'size', ('0.1', '0.2', '0.5'))
model.build('Geometry 1')
This, again, hides all tags in application code. Instead, we refer to nodes in the model tree by name. In the example, these names were generated automatically, in the same way the Comsol GUI does it. We could also supply names of our choice.
import mph
client = mph.start()
model = client.create('block of ice')
model.create('geometries/geometry', 3)
model.create('geometries/geometry/ice block', 'Block')
model.property('geometries/geometry/ice block', 'size', ('0.1', '0.2', '0.5'))
model.build('geometry')
If model.create() receives a reference to a node
that does not exist yet, such as geometries/geometry in the example,
it creates that node in its parent group, here the built-in group
geometries, and gives it the name we supplied, here geometry.
So far, we have used strings to refer to nodes. We could also use the
Node class, which offers more flexibility and extra
functionality. Instances of that class are returned by
model.create() for convenience. But they can be
generated from scratch by string concatenation with the division
operator — much like pathlib.Path objects from Python’s
standard library.
import mph
client = mph.start()
model = client.create('block of ice')
geometries = model/'geometries'
geometry = geometries.create(3, name='geometry')
block = geometry.create('Block', name='ice block')
block.property('size', ('0.1', '0.2', '0.5'))
model.build(geometry)
The division operator is the Swiss army knife for accessing nodes in
the model tree. It even works with client as root. Within that last
example, the following notations
client/'block of ice'/'geometries'/'geometry'/'ice block'
model/'geometries'/'geometry'/'ice block'
geometries/'geometry'/'ice block'
geometry/'ice block'
block
all refer to the same geometry element in the model. We could also include the forward slash in a string expression instead of using it as an operator, just like we did in the first and second example.
model/'geometries/geometry/ice block'
The model’s root node can be referenced with either model/'' or
model/None. If any of the node names in the hierarchy contain a
forward slash themselves, that forward slash can be escaped (i.e.,
marked to be interpreted literally) by doubling it, for instance:
geometry/'ice//frozen water'.
The example model discussed here produces the following model tree:
>>> mph.tree(model)
block of ice
├─ parameters
│  └─ Parameters 1
├─ functions
├─ components
│  └─ Component 1
├─ geometries
│  └─ geometry
│     ├─ ice block
│     └─ Form Union
├─ views
│  └─ View 1
├─ selections
├─ coordinates
│  └─ Boundary System 1
├─ variables
├─ couplings
├─ physics
├─ multiphysics
├─ materials
├─ meshes
├─ studies
├─ solutions
├─ batches
├─ datasets
├─ evaluations
├─ tables
├─ plots
└─ exports
The parameter group, model component, default view and coordinate system were created by Comsol automatically. We could rename these nodes if we wanted to. Most built-in groups are still empty, waiting for features to be created.
The demo script create_capacitor.py shows how to create
more advanced features than in the simple example here: It generates
the demonstration model used in the Tutorial.